Category Archives: Science Notebooks
Science Notebooks
I’ve gotten lots of questions about my science notebooks and the duct tape down the spiral binding…so I thought I would answer the most popular question! 🙂
Putting the duct tape down the side–BEST idea ever! The notebooks held up so well, most of them look good as new even though we filled up about 3/4 of the pages in the notebooks. They were also crammed into the kiddos seat sacks each time we were done with them and they still look great!
There were a few pages that came out of some notebooks here and there, but I think that would happen with any spiral notebook in the hands of a Kindergartener! 🙂
These are my notebooks shortly after I made them and this is pretty much how they looked at the end of the year! 🙂


I know I’ll be using duct tape again this year!

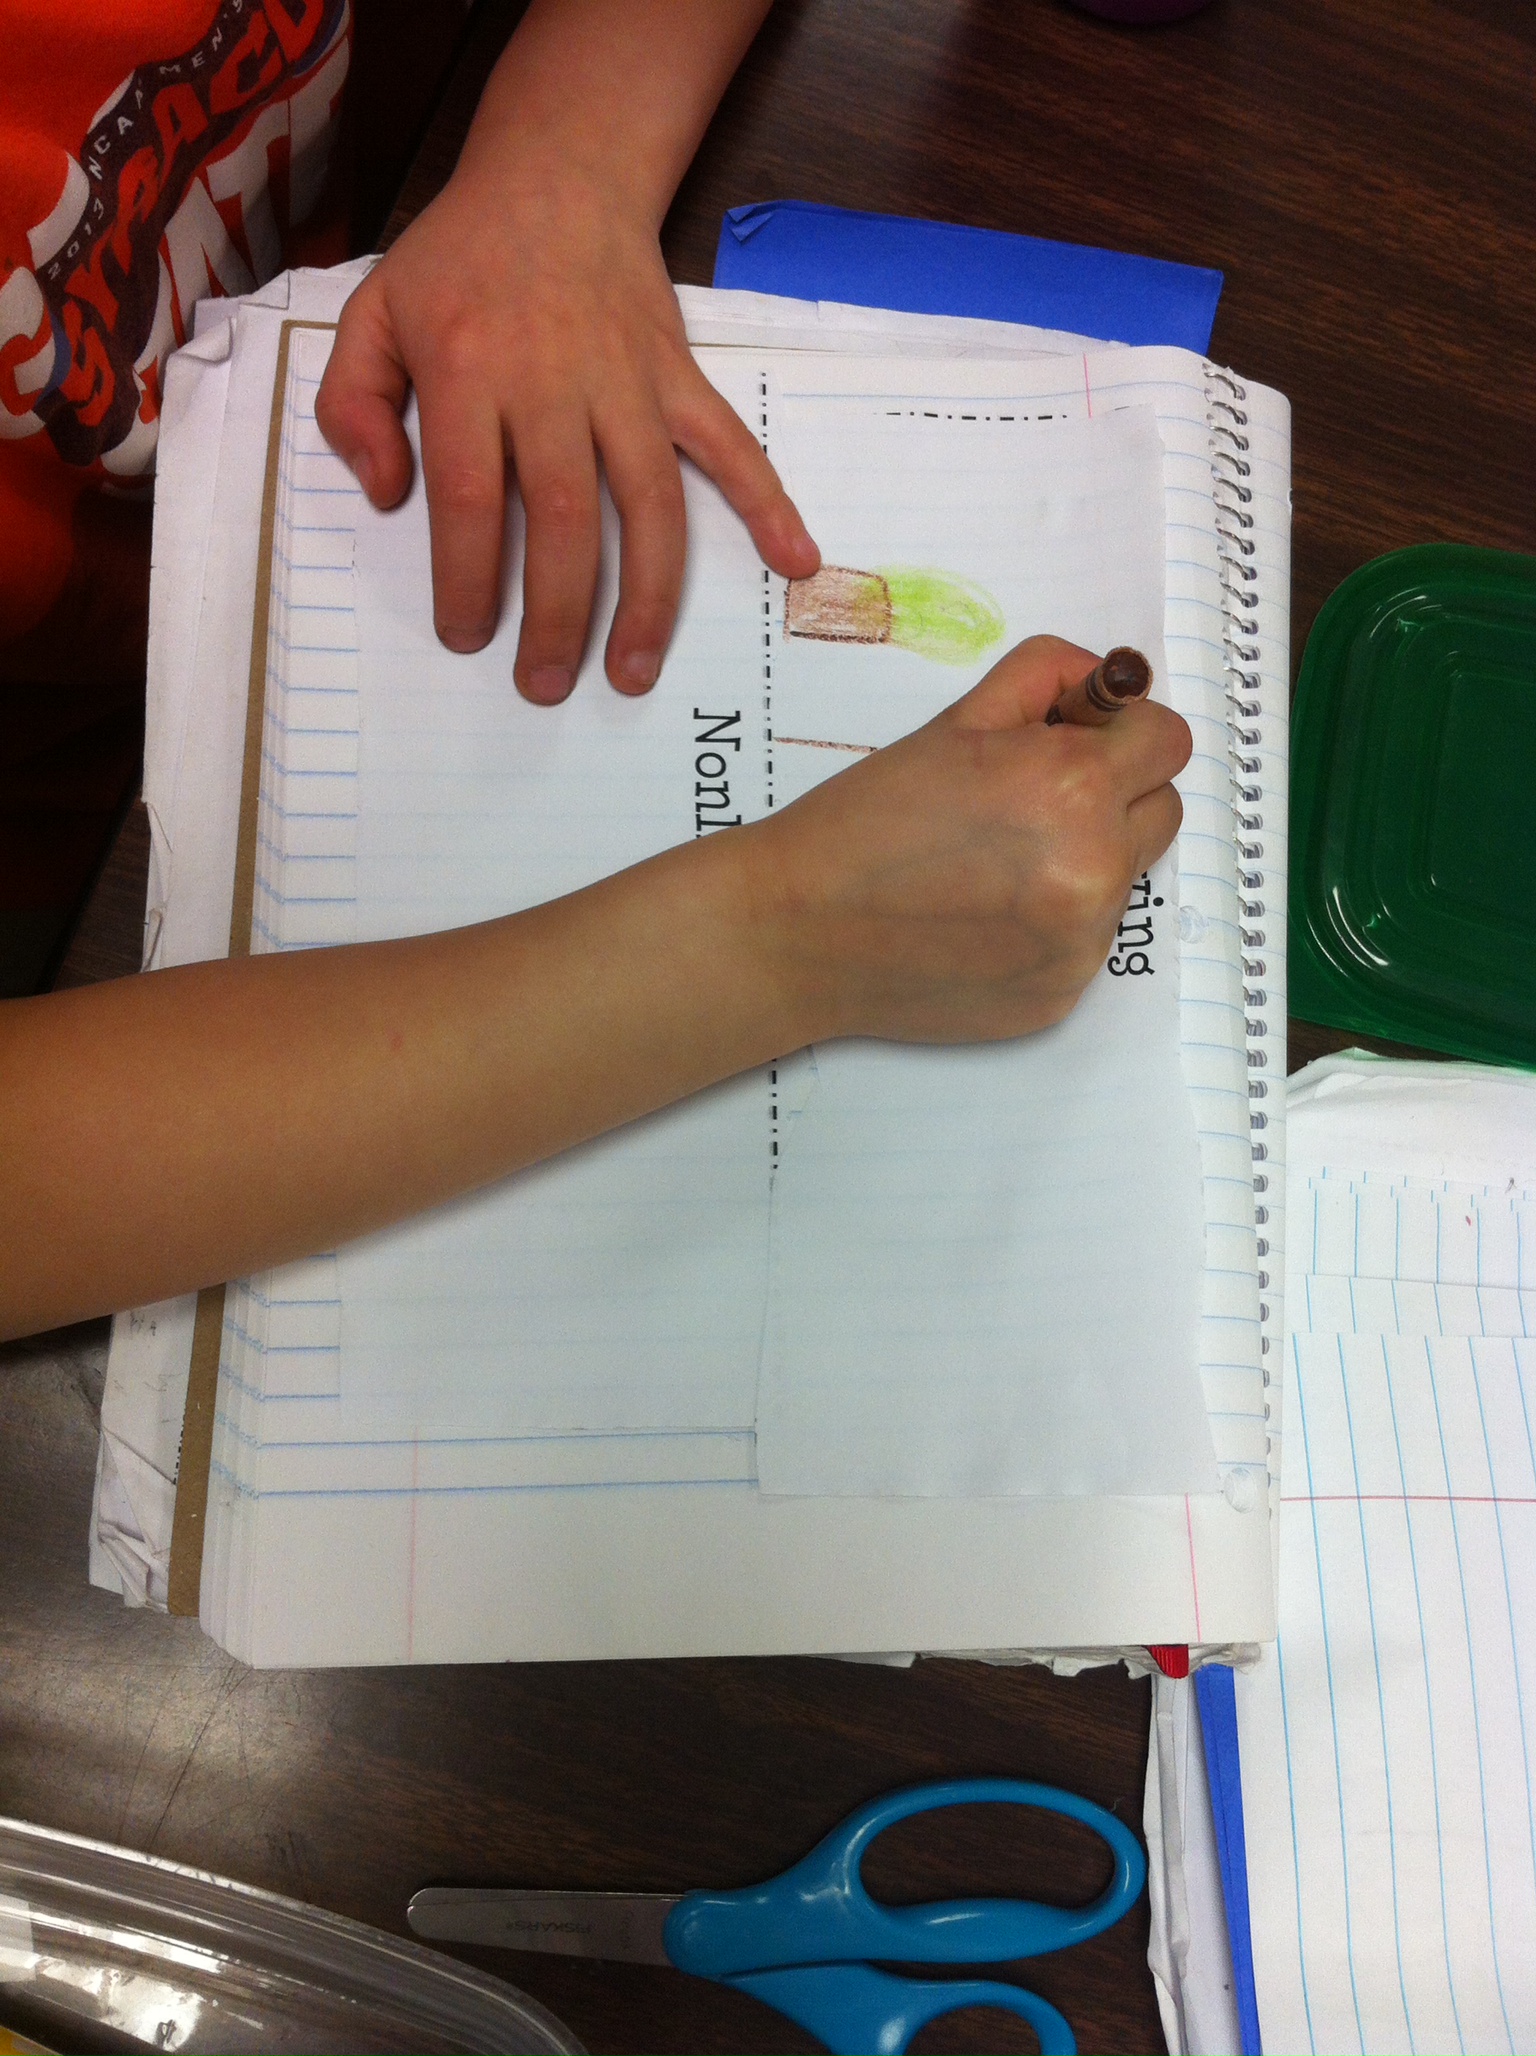
Living and Nonliving
We started one of my most favorite units this week–our Living and Nonliving unit! I had the kiddos draw and write about what they thought Living and Nonliving meant and had them write or draw about it in their Science Notebooks:


I LOVE Kindergarten writing!! 🙂
She’s writing “We are living”.
“Mrs. Poindexter, this is a paper heart, not a real heart, real hearts beat, paper hearts do not”. 


 As they notebooked, I walked around asking them what “living” and “nonliving” meant to them and why they chose to draw or write some of the things they did. I used this as kind of a pre-assessment to help me figure out how long we needed to spend on defining what living and nonliving mean to this group. They did a pretty good job with their choices and were able to give several reasons why they drew and wrote what they did.
We got together in partners after they had 10 minutes to draw and write to discuss with their partners about what they chose to write or draw about. Its always so interesting to me to listen in on their conversations and hear what their thinking is and the understanding behind their thinking.
Kristen 🙂
More Science
We are quite on our way with our science! We are using the National Geographic science kits we adopted a few years ago. I like them a lot, but I personally think there is not enough content to each lesson, so I add my own things in. I also have my kiddos notebook when ever we can and this lesson about properties was perfect!
 We were looking at how scientists (and mathematicians too!) use non-standard items (unifix cubes in this case) to measure objects. We first predicted how long we thought the object would be. I placed one cube at the end of each object and we made our estimates from there. We then went back to the next column and collected the actual amount.
We also talked about how we know when to round up to the next cube and when its fine to call the object even with the cubes.
I created this recording sheet for my kiddos to take notes on as we went (setting them up to do this on their own in a few months!!). They sat on the floor with their papers on their clipboards while I had each of the objects up on my visual presenter. I wanted to demonstrate how we measure before turning it over to them.
Kristen 🙂
Our First Science Experiment
As I mentioned yesterday, we had the film crew in last week to video tape our first science lesson.
I decided that we would put M&M’s into water and learn about observation. We placed the M&M’s into the water at the same time and the reactions were priceless!
Here are some pictures of what it looked like afterwards. I always say science is a success if it was loud and messy!


We set the cups on the counter so we could come back and observe them after a few days. 

Kristen 🙂
Science Notebooks
I passed out my science notebooks to my kiddos last week. The video crew was back to film us starting the year off with science and it seemed like the perfect time to hand them out. I was home one day last week with my 9 year old (he had the virus that’s going around our school) and I had the chance to finish up the science notebooks.
Here they are before I started. Each child brought 2 spiral notebooks to school with them this year, one for math, one for science. Some were thicker than others, so it took a little more work to get them set up.
I first started by having the children decide which color of duct tape they wanted on their spines. They could choose pink or green, because those were the colors I had. They also chose what color ribbon they wanted. I am a Stampin’ Up! demonstrator so I had LOTS of leftover ribbon and I take it to school to use when its retired. 🙂 I taped the back first and wrapped the tape around to the front. The purpose of the tape is to help hold the notebook together. They get loved quite a bit, so I’m hoping that this will help us keep the front and back covers together all year! 🙂
I wrapped the duct tape from the back to the front. The spiral notebooks that are 70 pages just need one piece of duct tape to fold from back to front. Some of the thicker notebooks took two pieces of duct tape to fit all the way around the spiral.
I taped in their ribbon choice to the back of their notebook. We will use these as book marks each time we make an entry into our notebooks.
Here they are all finished! 🙂 I also added a label to the front that said “_________________’s Science Notebook”.
Kristen 🙂
Freebie Friday 3

As promised, here is the Science Notebook Table of Contents for you. 🙂
Click the picture to get it for yourself (and then click the blue chevron Fan Freebie tab to download).

Kristen 🙂
Bird Beaks
About a week ago, we explored different kinds of bird beaks. I attended a workshop at NSTA in April that was all about My Big Backyard where the presenters shared an exploration of bird beaks.
I collected a variety of materials that birds might eat or use:
Fish (found in the bait section of Wal-Mart)
Worms (found in the bait section of Wal-Mart)
Birdseed
String
We also used wooden skewers, spoons, and clothespins to represent different kinds of beaks.
The kids then had a chance to test out each beak.

I buried the worms in a little bit of soil to make it more realistic. 🙂
The string that a bird might use to make a nest. 


The kids put what they were able to pick up in their stomachs (cups) 🙂
The “warm” sticker on the cup above was from another activity we did–I needed more cups so each kiddo had one. 🙂


The kids loved it and we created a chart in our notebooks to show what each beak was able to pick up easily.
Kristen 🙂
Oriental Trading
I was given the opportunity to be a Community Blogger for Oriental Trading Company. I got a gift card and could buy anything I wanted to use in my classroom, so here’s what I got! (I’m SO excited!!!)
This is the Awesome Alphabet Pocket Chart. I’ve wanted one of these for a long time! I’ve seen these on different sites and they were always so expensive so I kept waiting. Now I have one and it didn’t break the bank! I love this chart because it comes with the pocket chart which can be hung on a garment rack with a pants hanger or book binding rings. It can also be hung on the wall with some of those 3M Command hooks (love those!) I also love how I can use this pocket chart over and over with a variety of activities:

The pocket chart comes with all these different cards. 
The kids can put the picture cards in the appropriate pockets on the chart. 
Each picture card is labeled with the word on the back–I’m thinking how great this would be later in the year during Writer’s Workshop. How do you spell raccoon Mrs. Poindexter? The kids can go get the picture card!
Also included are the lower case letters so the children can match lowercase letters to the correct pocket. 
And of course there are uppercase letters as well! 🙂
I also got these Center Organizing Charts. I didn’t know that Oriental Trading carried Carson-Dellosa charts, but they do! 🙂 These are going to be great next year for my Literacy Work Stations. Sometimes there just isn’t any room to put a center activity in my already crowded class room, so these will hang wonderfully from the wall or door! 

Each chart (there are 3 in the package) has two larger pockets on the top and a smaller clear pocket on the bottom. I’m thinking that any materials for the activity will go in the top two pockets and dry erase materials or small items like dice will stay in the smaller pocket. They are super strong too! They will hold up to 5 year old use! 🙂 
You get three charts in each package, green, blue, and yellow. 
The next item are these dry erase stars. (They also come in apple shapes too!). I’m going to use these at my small group table next year so my kiddos can write down their work and not have to waste anytime getting out paper and pencils. The stars are removable and reusable! I hung this one on my wall to try it out and it was super sticky and took a little effort to pull off, but the paint wasn’t harmed! 🙂 
I took this picture after I erased the words just to show how cleanly they erase. 🙂
I also picked up this 100 Days of School Countdown Banner. It was a steal at $1.49! 🙂 I’m going to hang this up in my classroom and we are going to have some fun counting up to the 100th day of school next year! 🙂

I can’t ever have too many dice! 🙂 I got a dozen of these foam dice (1 1/2 x 1 1/2) so my kids could play some math games. We always loose the traditional sized dice so these will be great and easier for us to find! I also like them because they’re foam. That means they will be quiet! 🙂 I liked that there are two of each color, making them easier to put 2 in a center and to figure out what center is missing a die. 
I got these Laser Smile Face notepads because I had a great idea about how to use them! I watch my kiddos when we are out and about collecting information in our science notebooks and although those are wonderful, they are sometimes really bulky to carry around. I thought we could use some of them as travel sized notebooks! There are 6 dozen in a box–that’s 72 of them in all, so they will last me a few years! When we are done writing down information, the kids can tear out a page and put it right into their bigger science notebook. 
I also thought I might order some more notebooks with the spiral biding and use them to respond to math questions. I’m thinking I could write and number on each page and the kids could flip to the correct number that answers my question. 🙂
Did you also know that Oriental Trading offers FREE shipping on orders over $25 until August 24, 2013? That’s a great deal! I’ve already got a wishlist going there! 🙂
What are your favorite Oriental Trading products? I’m always on the hunt for more! 🙂
Kristen 🙂
The opinions expressed in this blog post are entirely mine and were not influenced by Oriental Trading in anyway. I was provided with a gift card by Oriental Trading Company. 🙂
Ponds and Plants
I just finished up (finally!) a new 72 page pack about Ponds and Plants. Lots of math, literacy, and science notebook activities are included along with recording sheets for each activity. Click the picture below to check it out! 🙂


Kristen 🙂
Living/Nonliving Investigation
Because we’ve been talking so much about living/nonliving things, I wanted to see where the kids were in their understanding, so I set up 6 stations around the room (3 living/3 nonliving) and the kids had a chart to check out each of the items and answer a few questions in their science notebooks:

Here they are looking at a red worm. That kept their attention for AWHILE! 🙂
Why did you put a book on this plate Mrs. Poindexter? It’s just a book! “Yes, it’s just a book, but what do you observe about it?” OH, they said! 🙂
Where’s the thing we’re supposed to observe? Right there. That’s a pencil. I know, that’s what you’re supposed to observe. But it’s a pencil. I know! 🙂
More of the popular red worm! 🙂
Here the poor thing is curled up and scared. 🙂 He was later safely returned to his home in our compost box!
Noodles? That’s silly Mrs. Poindexter! You eat them! So are they living or nonliving?

The meal worm out of the meal worm tank in our classroom–easiest classroom pet EVER and good for so many things! 🙂
These are 5 of the items I had out. The 6th one was my assistant. She sat at one of the tables and the kids had to figure out if she was breathing, moving, and if she would stop living one day, and then if she were living or nonliving.

The red worm…getting comfortable and all stretched out!

Pencil
Book
Noodles
Meal worm
These great dishes and bowls are from the kids section at IKEA. They are so handy and I use them all the time to hold different materials. The cups that match this set are great too–an awesome size for storing crayons and sorting them by color.
Kristen 🙂


